This guide will help you integrate StablePay stablecoin payment functionality into your Shopify store.
1. Create Your Shopify Store
- Log in to the StablePay Merchant Portal.
- Navigate to the Store Management page and click [Create Store].Select Shopify as the Channel Type and click submit. Please wait for StablePay’s review and approval.
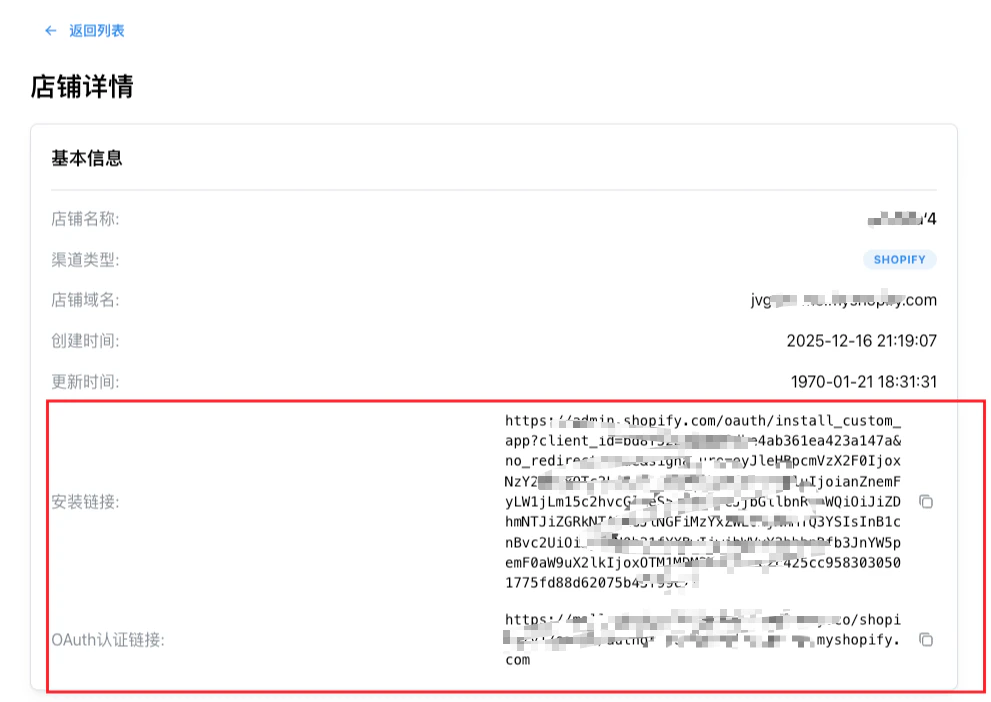
- Once approved, you can obtain your payment plugin installation link from the Store Details page.
2. Install StablePay Payment Plugin
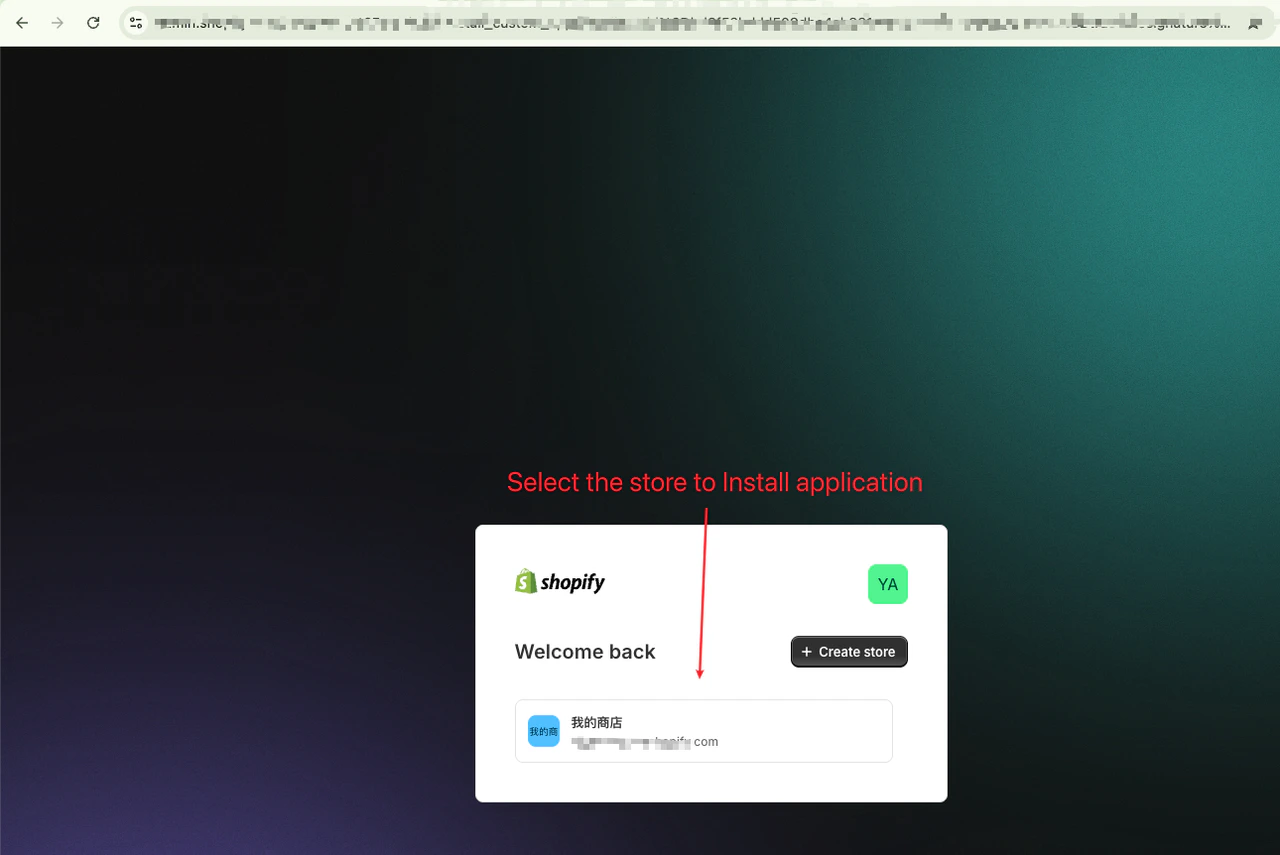
Step 2.1: Visit Installation Link
- Make sure you’re logged into your Shopify store admin
- Visit the installation link in your browser
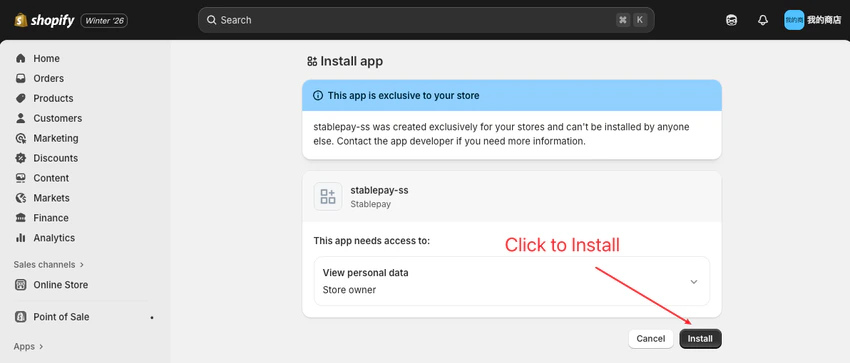
Step 2.2: Install Application
Click the “Install” button
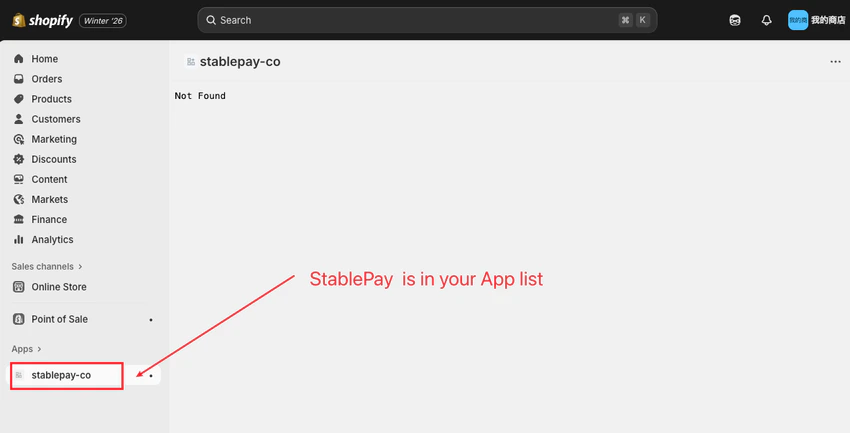
Step 2.3: Complete Installation
3. Complete Pre-configuration
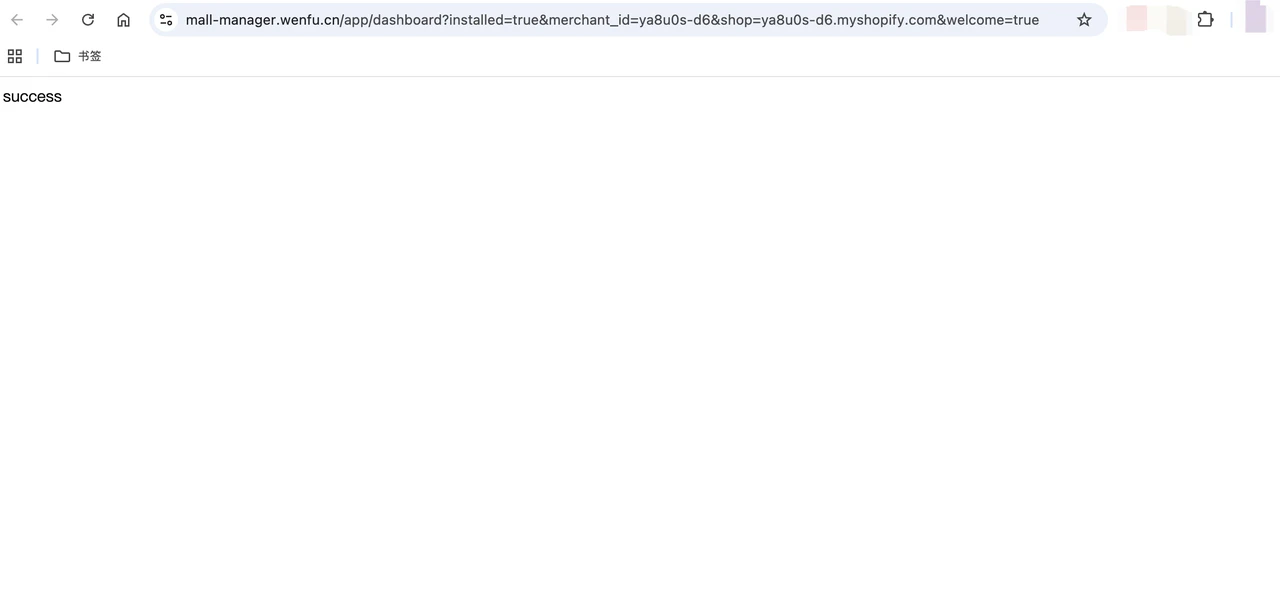
The StablePay team will provide a pre-configuration link. Open the link in your browser to complete the pre-configuration.
A “success” message indicates successful pre-configuration.
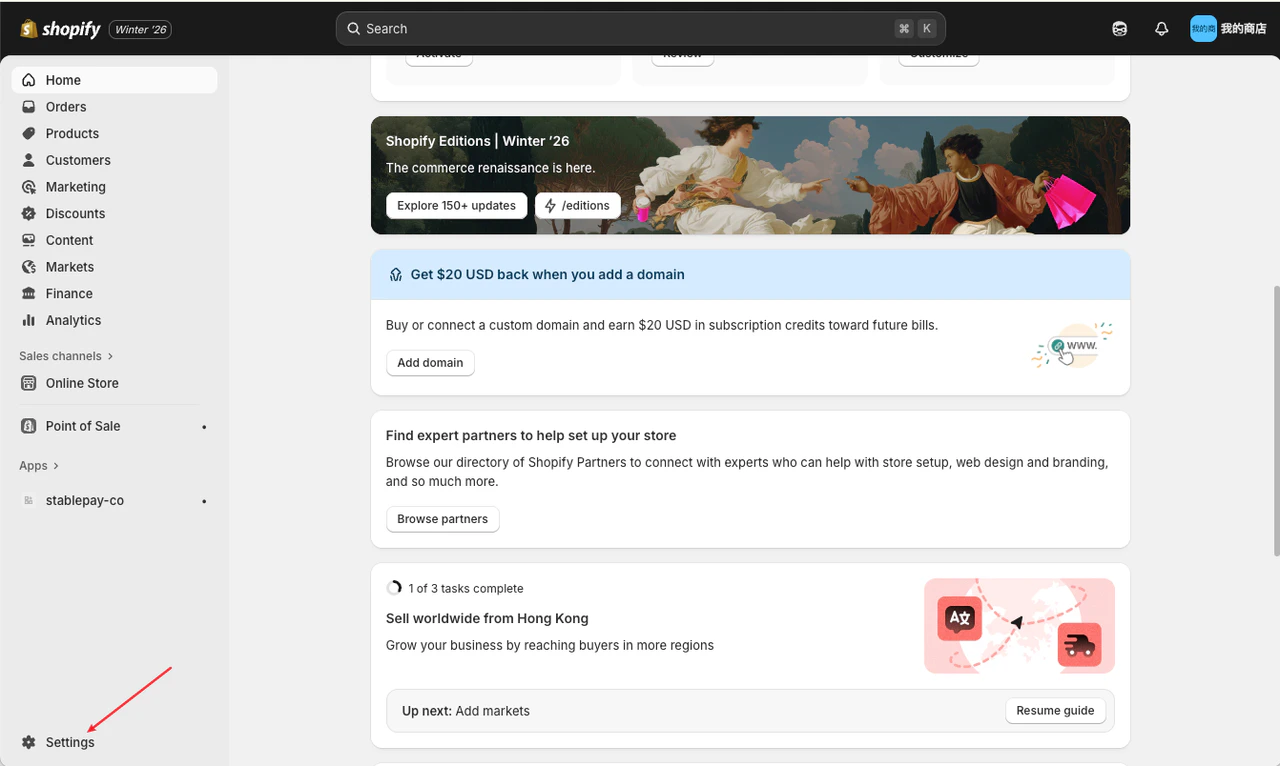
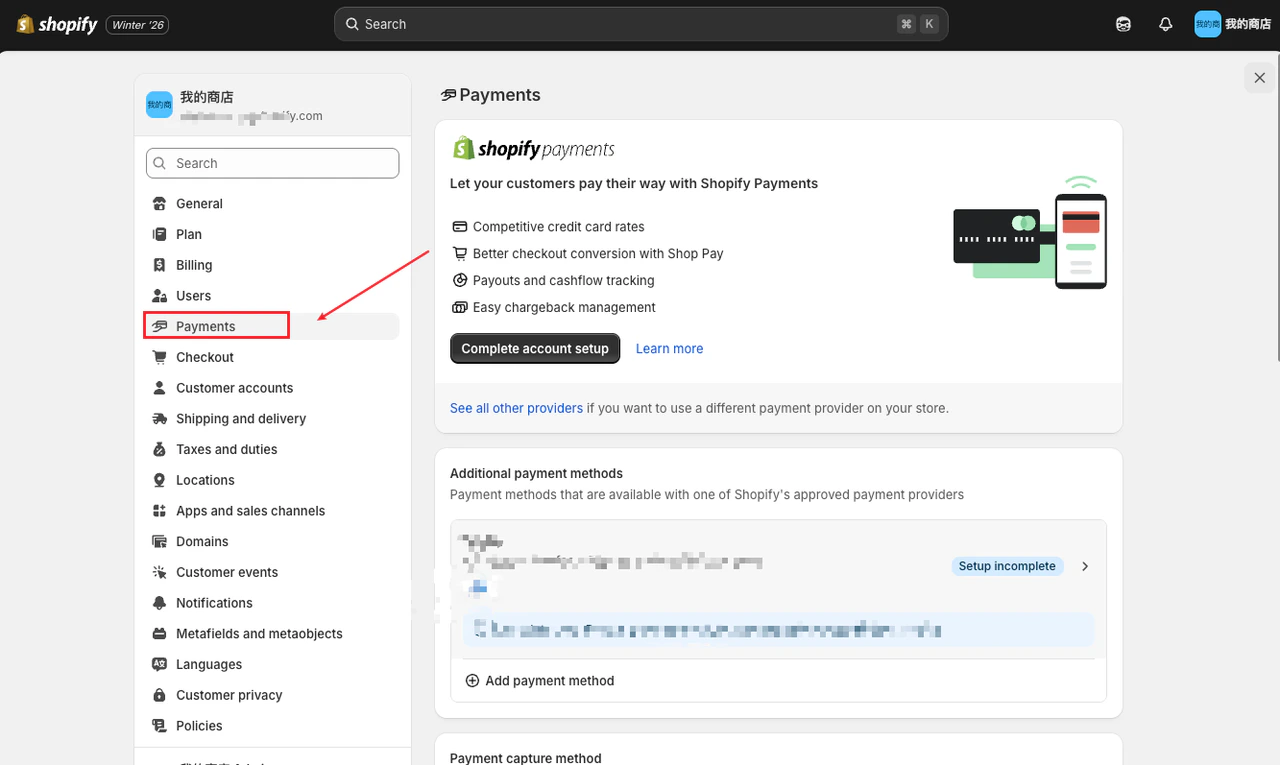
Step 4.1: Enter Store Settings
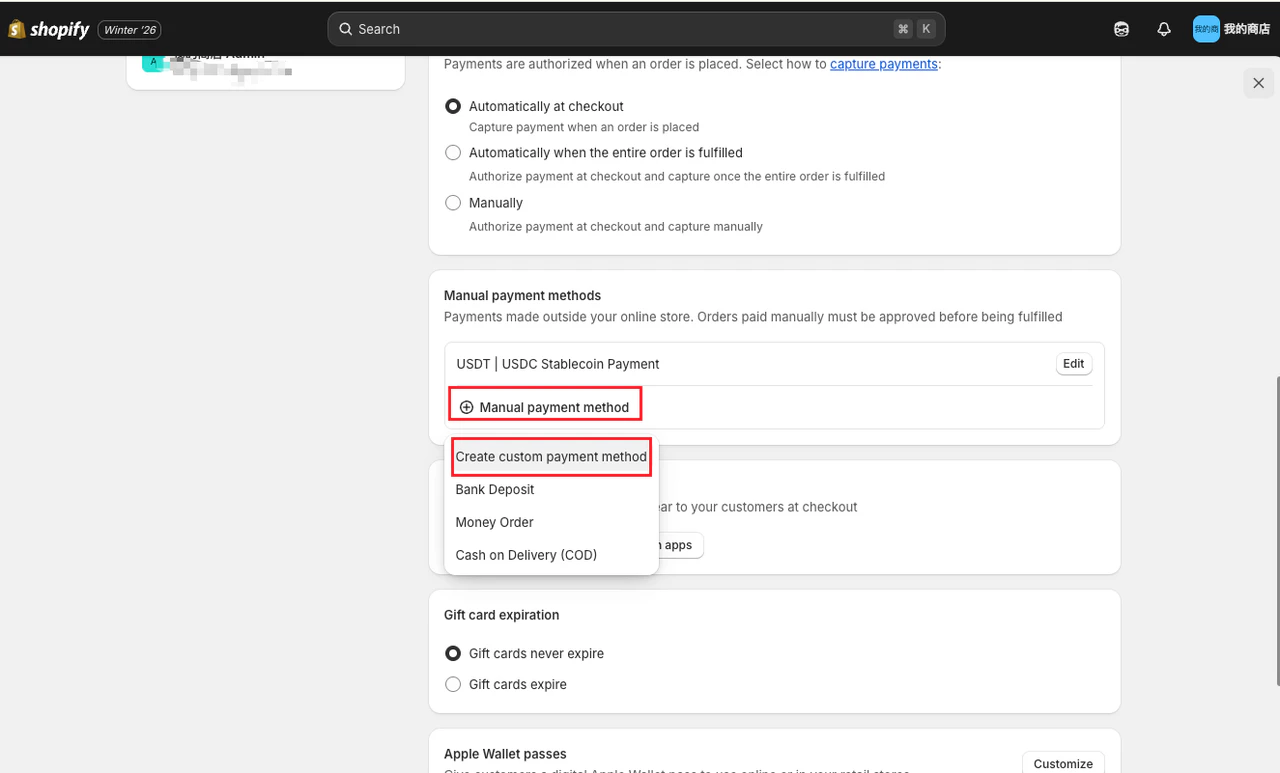
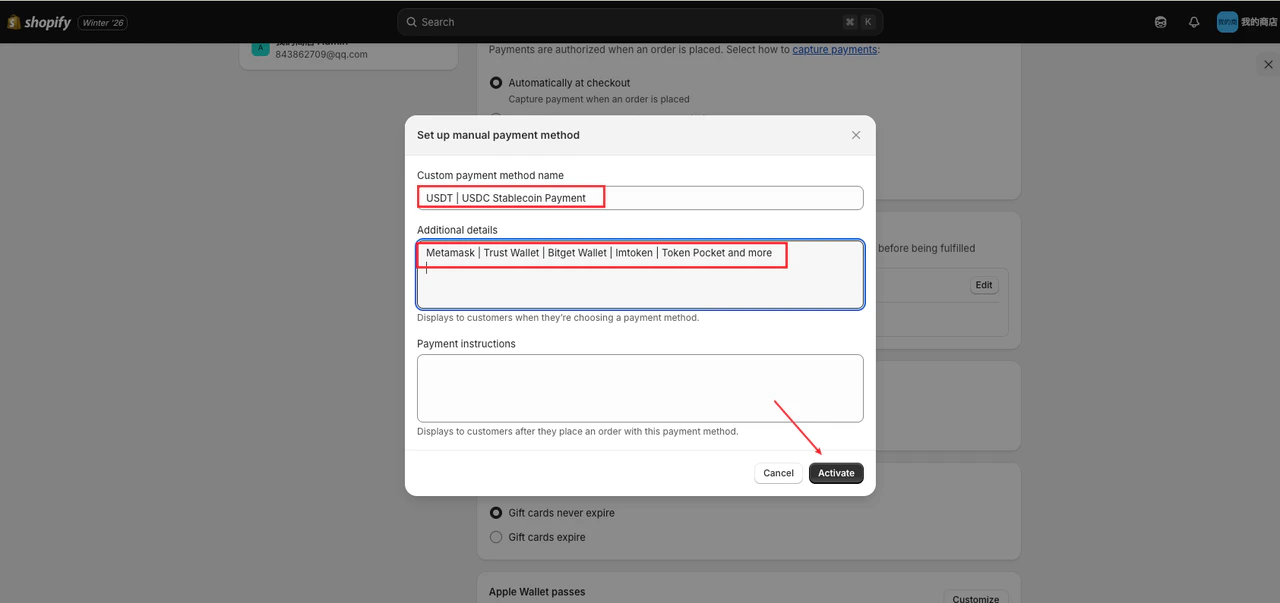
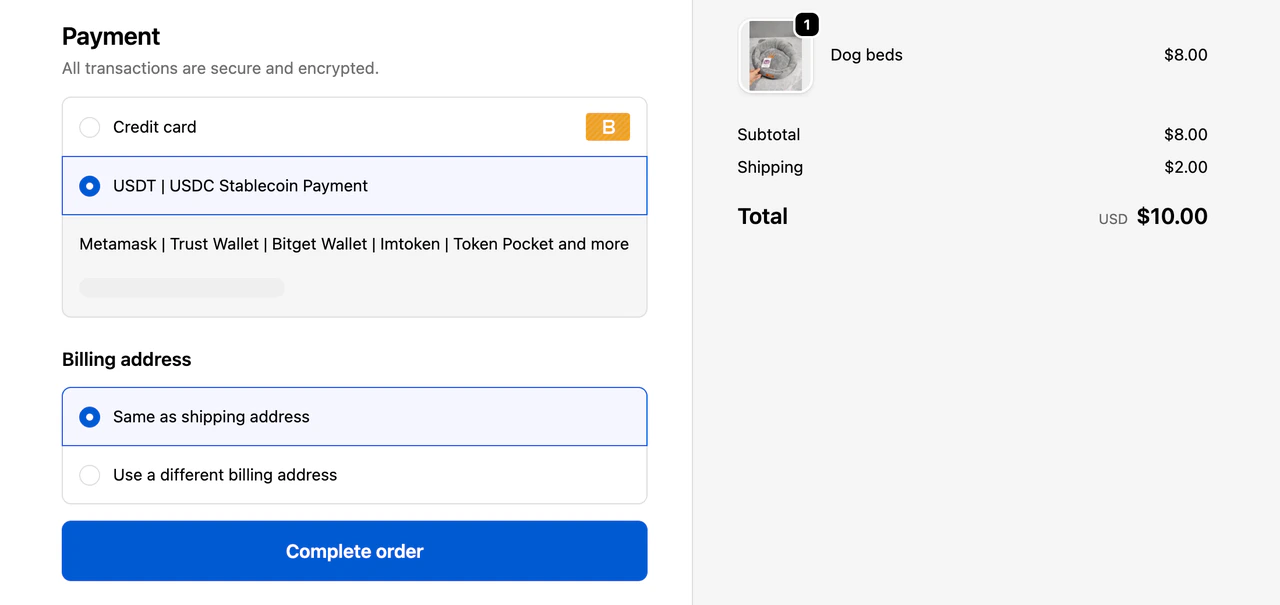
Step 4.2: Add Custom Stablecoin Payment Method
Custom Payment Method Name:
Additional Details:
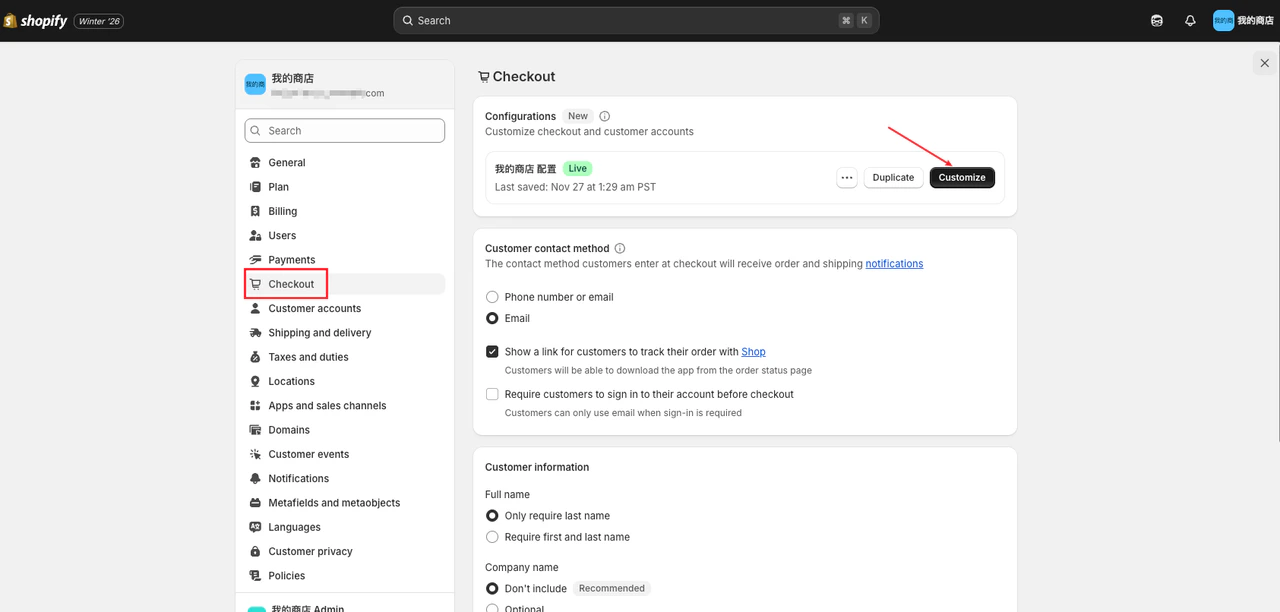
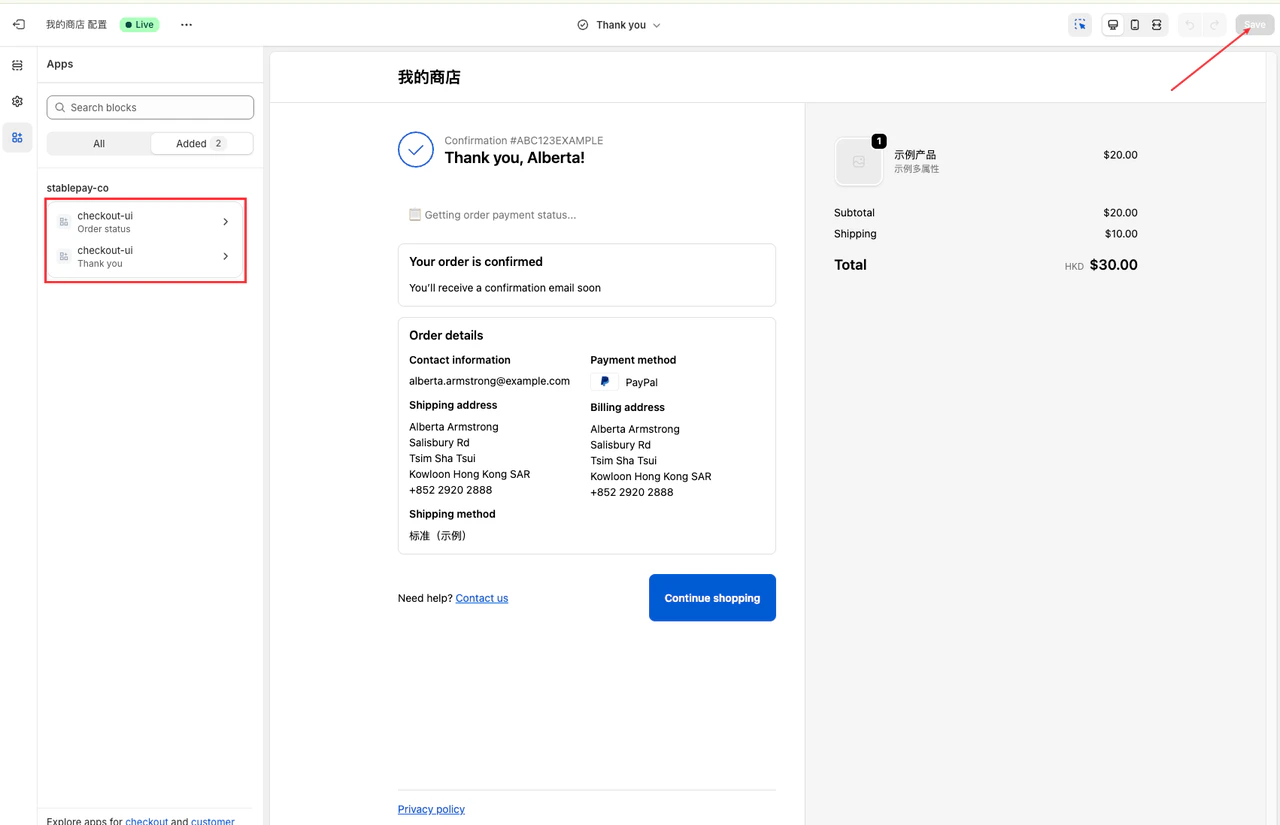
Step 5.2: Click Customize
Click customize to see the following interface:
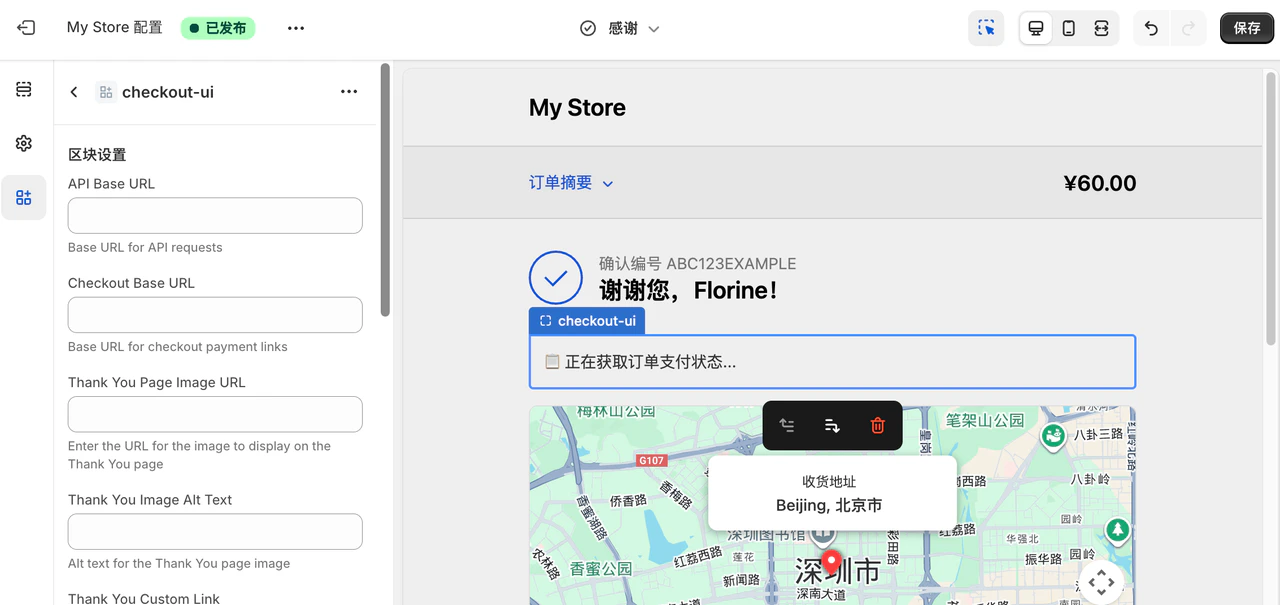
Step 5.3: Add Thank You and Order Status Pages
Add both Thank You and Order Status pages, then Save to apply changes.
6. Configuration Complete - Start Accepting Payments with StablePay
Last modified on April 17, 2026