
1. Prerequisites
1.1 System Requirements
Before starting the integration, please ensure your WordPress environment meets the following requirements:
Required PHP Extensions:
- cURL (for API communication)
- JSON (for data processing)
1.2 Obtaining a StablePay Merchant Account
Please contact StablePay support to activate your merchant account. After activation:- Log in to the StablePay Merchant Dashboard
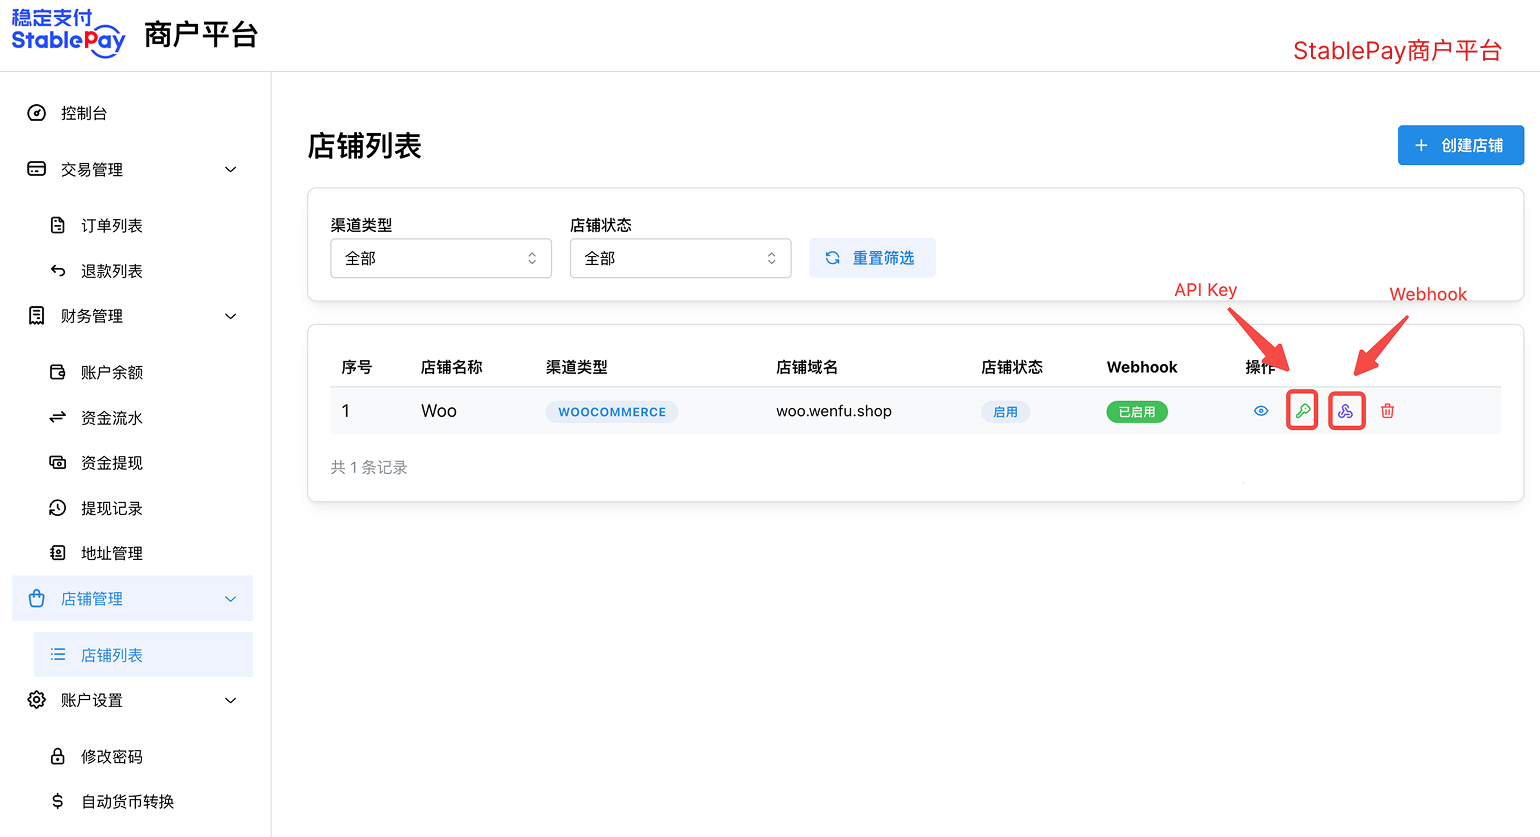
- Navigate to Store Management, click [Create Store], select WooCommerce as the channel type, and submit for StablePay review
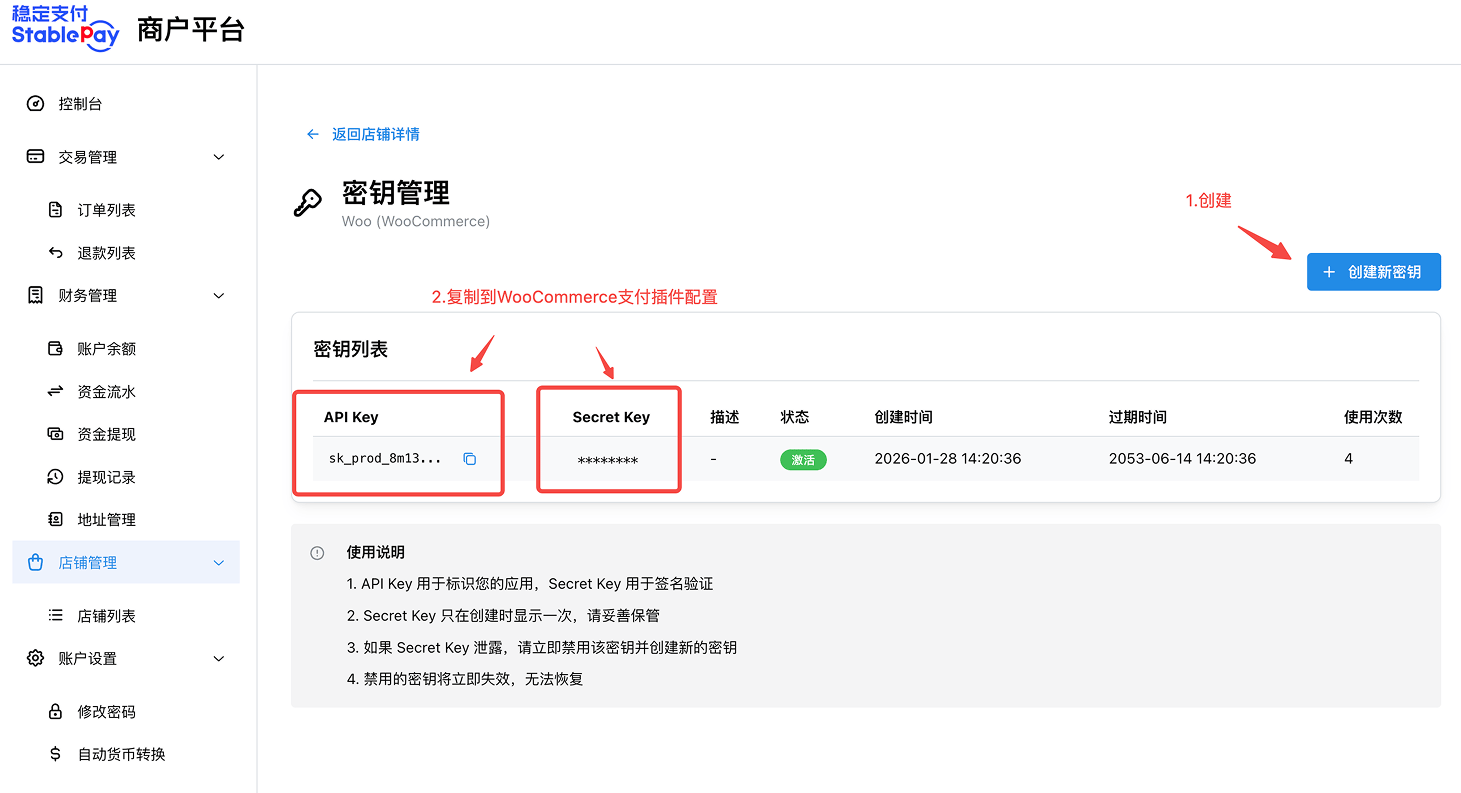
- Once approved, you can obtain your API Key, Secret Key, and Webhook Secret from the store list
2. Plugin Installation
2.1 Download the Plugin Package
Click to download the latest version of the plugin package: 📦 Download stablepay-woocommerce-1.0.0.zip2.2 Method 1: WordPress Admin Installation (Recommended)
- Log in to your WordPress admin dashboard
- Navigate to Plugins → Add New → Upload Plugin
- Click Choose File and select
stablepay-woocommerce-x.x.x.zip - Click Install Now
- After installation, click Activate Plugin
2.3 Method 2: Manual FTP Installation
- Extract
stablepay-woocommerce-x.x.x.zip - Upload the extracted
stablepay-woocommercedirectory towp-content/plugins/via FTP/SFTP - Log in to your WordPress dashboard and navigate to the Plugins page
- Find StablePay for WooCommerce and click Activate
3. Plugin Configuration
3.1 Accessing the Settings Page
After activating the plugin, access the configuration page using one of the following methods:- Method 1: WordPress Dashboard → WooCommerce → Settings → Payments → StablePay
- Method 2: WordPress Dashboard → Plugins → Installed Plugins → StablePay for WooCommerce → Settings
3.2 Basic Settings
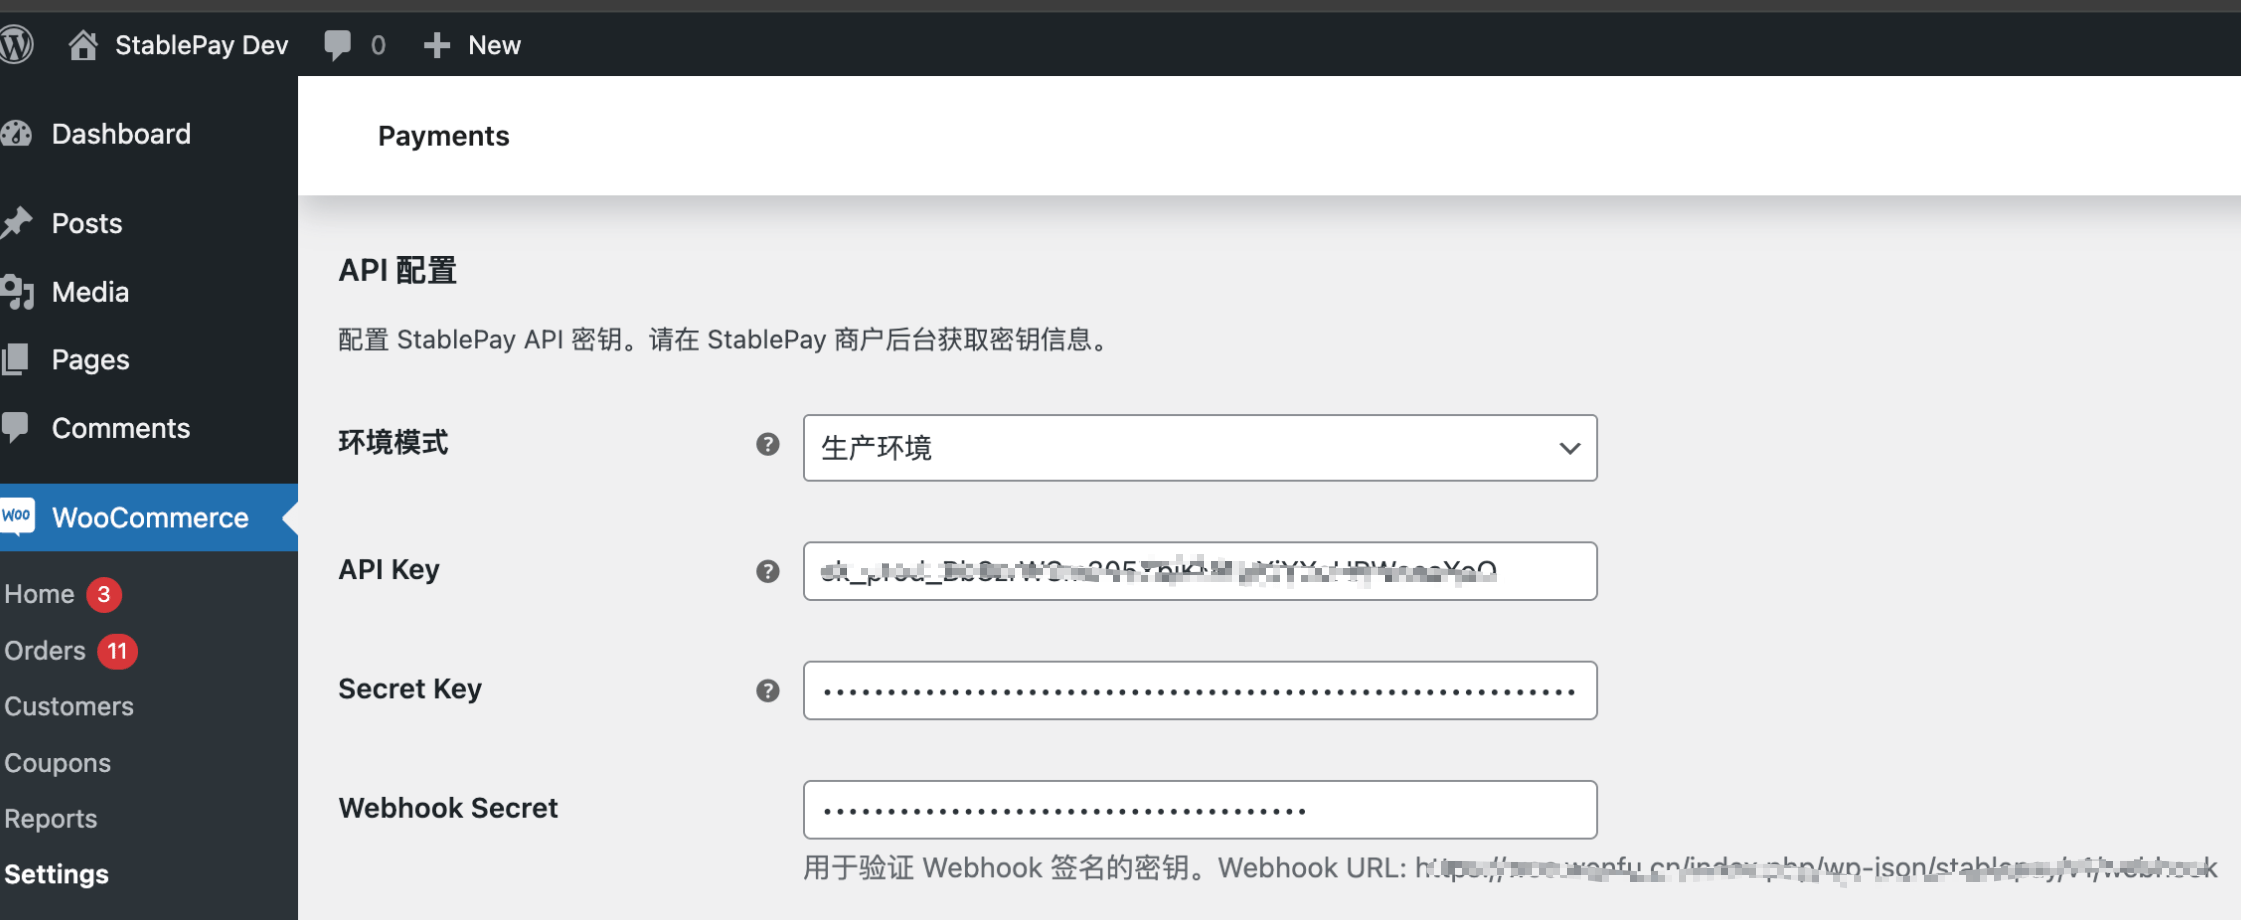
3.3 API Configuration

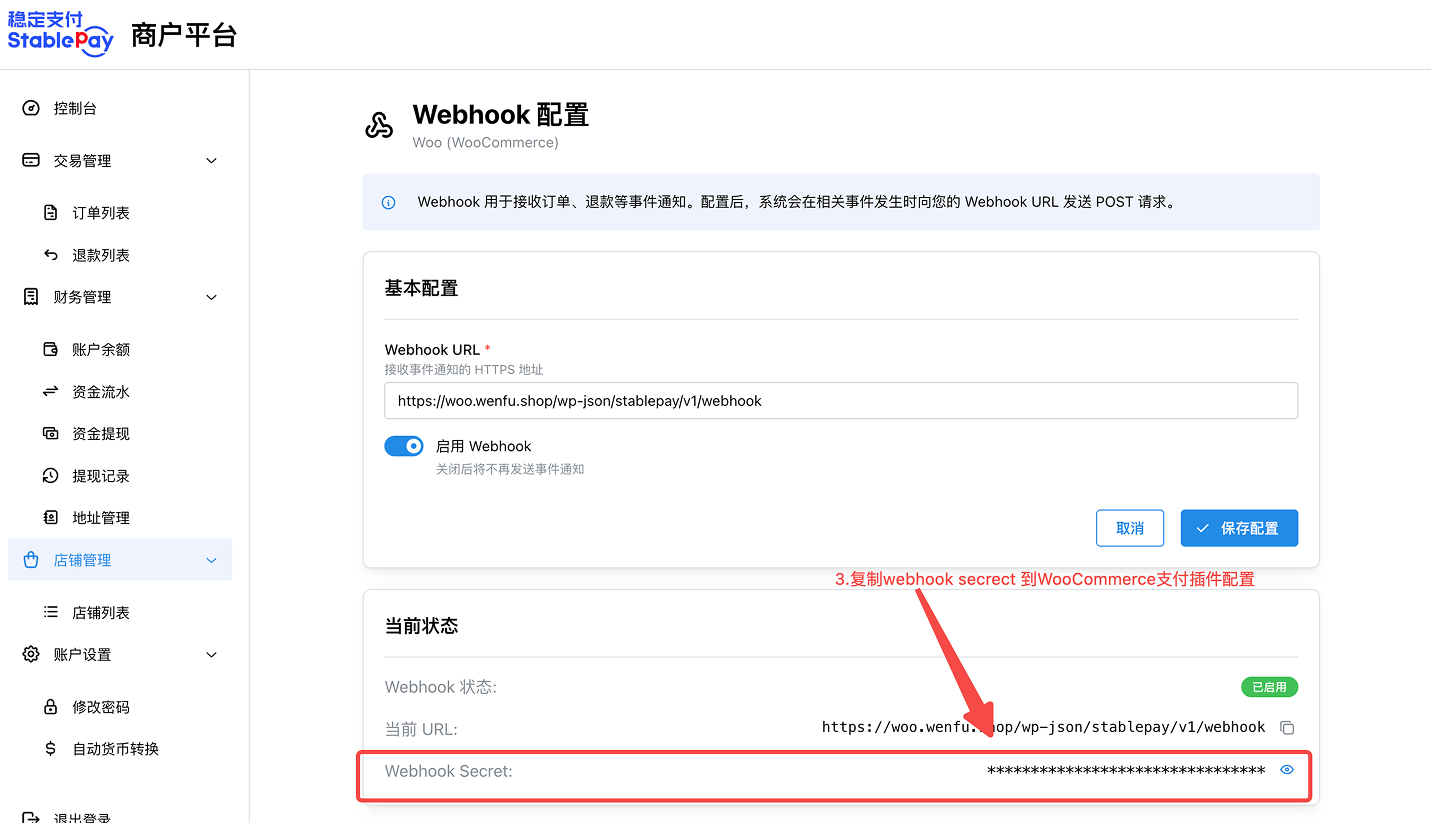
3.4 Configuring Webhooks
Webhooks are used to receive real-time payment status notifications. Once configured, the plugin will automatically generate the Webhook URL. Webhook URL Format:- Log in to the StablePay Merchant Dashboard
- Navigate to Store Management and manage your Webhook URL
3.5 Payment Options
4. Testing and Verification
After configuration, we recommend placing a small test order to confirm the payment flow works correctly.4.1 Verification Checklist
- StablePay payment option is visible on the checkout page
- Selecting StablePay redirects correctly to the payment page
- Automatic redirect back to merchant website after payment completion
- Order status automatically updates to “Processing”
- StablePay payment information is visible on the order details page
5. Daily Operations
5.1 Viewing Order Payment Information
- Navigate to WordPress Dashboard → WooCommerce → Orders
- Click the order number to view details
- In the StablePay Payment Information section, you can view:
- Payment Session ID
- Payment Currency
- Actual Amount Received
- Transaction Hash (viewable on blockchain explorer)
5.2 Processing Refunds
- On the order details page, click Refund
- Enter the refund amount and reason
- Click Refund via StablePay
- Wait for the refund to be processed
- Only paid orders can be refunded
- Full and partial refunds are supported
- Refund must be requested within 180 days of payment
- Refunds will be returned to the customer’s original wallet
6. Frequently Asked Questions
Q1: What should I do if the plugin fails to activate?
Checklist:- Is PHP version ≥ 7.4?
- Is WordPress version ≥ 5.8?
- Is WooCommerce installed and activated?
- Is the cURL extension enabled?
Q2: Payment succeeded but order status not updated?
Possible Causes:- Webhook URL not configured or incorrectly configured
- Incorrect Webhook Secret
- Server firewall blocking callback requests
- Confirm the Webhook URL is correctly configured in the StablePay dashboard
- Verify the Webhook Secret matches
- Check server firewall settings
- Review logs to confirm webhook requests are being received
7. Technical Support
For any questions, please contact us through the following channels:- Website: https://stablepayfi.ai
- Merchant Dashboard: https://merchant.stablepay.co
- Technical Support Email: support@stablepay.co
- Documentation Center: https://docs.stablepayfi.ai